I am sorry I don't have today's entry ready. We are dealing with a problem with a family member. Hopefully, everything will soon resolve itself properly, and I can resume my writing schedule in a few days.
-Steve

Sunday, November 11, 2012

Sunday, November 4, 2012
Fast and Easy French Pre-Dreadnoughts
When I first examined a copy of "Jane's Fighting Ships 1914" the ship that grabbed my imagination more than any other was the French pre-dreadnought "Bouvet", laid down in 1893. The photograph and plan drawing showed an amazing collection of turrets, housing guns of several sizes. The bulge of the tumble-home hull with the low turrets riding thereon, gave the appearance of a vessel already sinking. Looking at the pictures of "Henri IV", "Carnot", and "Charles Martel" one realizes the French naval architects were working with an totally different vision than that of other navies.
One of my first games of "Memoir of Battle at Sea" was to be a match-up of German and French pre-dreadnoughts. I had the four German ships built in the style of Bob Cordery's SMS Schleswig-Holstein model. Now I needed the French opponents. I did not feel I had the ability to accurately carve the odd contours of the French style hull, but wanted to suggest it in some way. I laid out the basic cuts to be made on a four inch by two inch piece of 3/16" balsa. I also cut a four inch by 3/4" piece of 3/16" wood to represent the main deck.

Both pieces were cut to shape with an X-acto hand saw, then sanded. The outer edge of the larger piece was sanded to suggest the inward slope of the hull.

The two pieces are glued together, then weighted until they dry.

The upper hull/deck is sanded to match the contours of the lower hull.

These are the other pieces. With the exception of the four half inch sections of 1/16" dowel(guns) and the 1/2" by 7/8" piece of balsa next to them, every piece here is a pre-milled hardwood fitting available at Hobby Looby or other craft stores. Two are small spools(stacks) and there are three sizes of furniture plug (various turrets). A small wooden cube is also used (chartroom).

Here are the first pieces attached. Support for stacks, chartroom, two medium turrets, and the sponson for the flank main turret.

Next to be added are the stacks, and the fore and aft small turrets.

Holes are drilled for the main guns, which are then glued in place. They are propped on a piece of scrap to dry.

Main batteries are added. All she needs is paint and a flag.

Here is an early effort with a coat of Testor's Gull Grey and one of Spike's printed flags.

Total cost of materials is about $2 US. Time for construction is about thirty minutes each. So far they have an 0-2 record against the High Seas Fleet.
NEXT SUNDAY: GAMING THE BATTLE OF DOGGER BANK, in Words and Pictures
One of my first games of "Memoir of Battle at Sea" was to be a match-up of German and French pre-dreadnoughts. I had the four German ships built in the style of Bob Cordery's SMS Schleswig-Holstein model. Now I needed the French opponents. I did not feel I had the ability to accurately carve the odd contours of the French style hull, but wanted to suggest it in some way. I laid out the basic cuts to be made on a four inch by two inch piece of 3/16" balsa. I also cut a four inch by 3/4" piece of 3/16" wood to represent the main deck.

Both pieces were cut to shape with an X-acto hand saw, then sanded. The outer edge of the larger piece was sanded to suggest the inward slope of the hull.

The two pieces are glued together, then weighted until they dry.

The upper hull/deck is sanded to match the contours of the lower hull.

These are the other pieces. With the exception of the four half inch sections of 1/16" dowel(guns) and the 1/2" by 7/8" piece of balsa next to them, every piece here is a pre-milled hardwood fitting available at Hobby Looby or other craft stores. Two are small spools(stacks) and there are three sizes of furniture plug (various turrets). A small wooden cube is also used (chartroom).

Here are the first pieces attached. Support for stacks, chartroom, two medium turrets, and the sponson for the flank main turret.

Next to be added are the stacks, and the fore and aft small turrets.
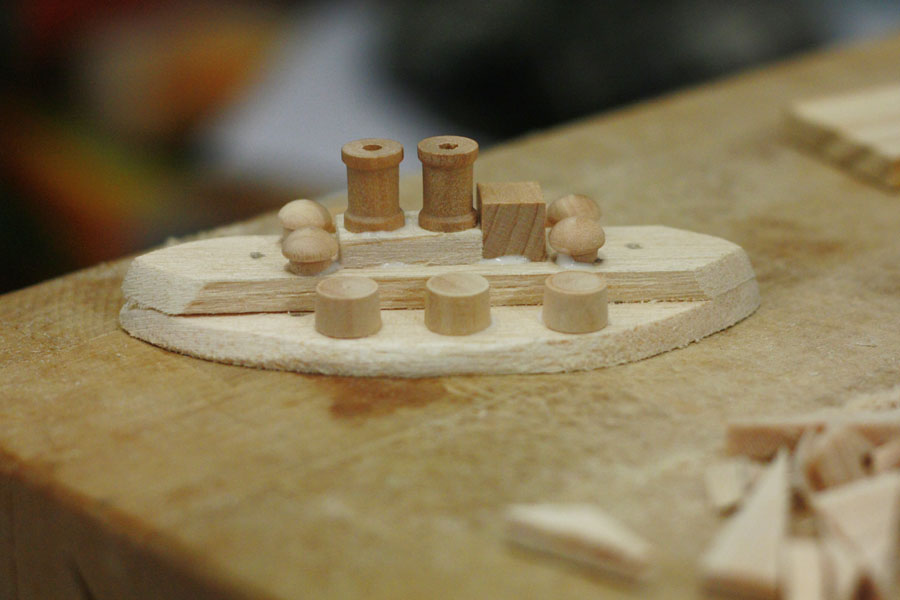
Holes are drilled for the main guns, which are then glued in place. They are propped on a piece of scrap to dry.

Main batteries are added. All she needs is paint and a flag.

Here is an early effort with a coat of Testor's Gull Grey and one of Spike's printed flags.

Total cost of materials is about $2 US. Time for construction is about thirty minutes each. So far they have an 0-2 record against the High Seas Fleet.
NEXT SUNDAY: GAMING THE BATTLE OF DOGGER BANK, in Words and Pictures
Tuesday, October 30, 2012
A brief post from Spike on in-game photography
Thank you to all the people who have given positive feedback on the photography in both of Steve's blogs. It was the hobby of miniature gaming that got me enthused enough to take my photography from simple snap-shooting up to the next level. I'm still a hobbyist with no real intent of going professional, but I thought I might share a few tips for others who want to get pictures of games in progress.
With any sort of photography, light is the most important thing. The brighter the area, the faster the image can expose. Quicker shutter speeds equal less blur and less work for the automatic focus. If your game area is under-lit, there's no need to spend piles of money. I invested in three "clamp lamp" style shop lights...basically a bulb socket with a removable metal reflector found at your hardware store for around $7 USD. Each is fitted with a 20 watt "soft white" CFL bulb, and all three are arranged around the room so that their light is directed toward the ceiling and reflected evenly on the game table below. This gets a nice even light with no harsh shadows.
Secondly, a sturdy tripod and hands-free shutter operation make for a crisper photo. Most modern digital cameras, even the inexpensive compact kind, have a 2-second timer option which eliminates any shake that a finger on the shutter button might cause. Many of the more sophisticated DSLRs have a jack for a remote shutter control and/or an infrared remote controller.
For super-macro shots taken at "ground level" on the playing table, sometimes the slope of the terrain will not permit simply setting the camera flat on the game board. For those occasions, I keep a zipper style plastic bag full of uncooked rice. This allows me to position and level my camera on an uneven surface where a tabletop tripod isn't feasible.
But the most important thing to remember with in-game photography is not to excessively inconvenience the players. Experiment with different angles and vignettes before the game begins. If your camera has a manual white-balance function, take a moment to adjust white balance right then rather than have to fiddle with it in your photo editing software later. Try to avoid using flash, as it can be anywhere from a mild distraction to a great headache, depending on the player. But mostly try to pay attention to the game even if you aren't a player. That way you're always ready for the "highlight" moments.
I was a little sad not to get to play in the two Martian scenarios, but then again I get to have games with Steve all the time...which is how he would have it if not for day-jobs and the need for slumber. I may one day soon ask him for a rematch and avenge Ben's vanquished Martian invaders with my "WOMD"...the mother of all tripod walkers...

With any sort of photography, light is the most important thing. The brighter the area, the faster the image can expose. Quicker shutter speeds equal less blur and less work for the automatic focus. If your game area is under-lit, there's no need to spend piles of money. I invested in three "clamp lamp" style shop lights...basically a bulb socket with a removable metal reflector found at your hardware store for around $7 USD. Each is fitted with a 20 watt "soft white" CFL bulb, and all three are arranged around the room so that their light is directed toward the ceiling and reflected evenly on the game table below. This gets a nice even light with no harsh shadows.
Secondly, a sturdy tripod and hands-free shutter operation make for a crisper photo. Most modern digital cameras, even the inexpensive compact kind, have a 2-second timer option which eliminates any shake that a finger on the shutter button might cause. Many of the more sophisticated DSLRs have a jack for a remote shutter control and/or an infrared remote controller.
For super-macro shots taken at "ground level" on the playing table, sometimes the slope of the terrain will not permit simply setting the camera flat on the game board. For those occasions, I keep a zipper style plastic bag full of uncooked rice. This allows me to position and level my camera on an uneven surface where a tabletop tripod isn't feasible.
But the most important thing to remember with in-game photography is not to excessively inconvenience the players. Experiment with different angles and vignettes before the game begins. If your camera has a manual white-balance function, take a moment to adjust white balance right then rather than have to fiddle with it in your photo editing software later. Try to avoid using flash, as it can be anywhere from a mild distraction to a great headache, depending on the player. But mostly try to pay attention to the game even if you aren't a player. That way you're always ready for the "highlight" moments.
I was a little sad not to get to play in the two Martian scenarios, but then again I get to have games with Steve all the time...which is how he would have it if not for day-jobs and the need for slumber. I may one day soon ask him for a rematch and avenge Ben's vanquished Martian invaders with my "WOMD"...the mother of all tripod walkers...

Halloween Special: ...That ends Welles
As we have seen in Adventures in Portable Wargaming, Britain has been invaded by Mars. Giant tripods have defeated a force of Territorials, and have moved to the coast. A shipload of refugees is trying to escape, covered by the Royal Navy. Four armored cruisers move up in line abreast, seeking gun range. The Martians ignore the transport ship, seeing nothing to fear from the vessel.

The Martians launch their "black clouds", which do no damage to the ships, but do impede the sailors' gunnery. The cruisers hit the tripod on the left for minor damage.

The heat ray hits one of the cruisers, doing frightening damage. Meanwhile, the Torpedo Ram Thunder Child moves up behind the merciless enemy.

The cruisers concentrate their fire against the right most walker, giving the refugee vessel a chance to escape. Thunder Child moves into position, still unnoticed. Three of the cruisers are in trouble.
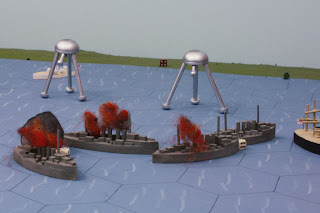
Thunder Child strikes, hitting with a torpedo, then ramming the left walker. Still it survives.

Two of the walkers turn their heat rays on the valiant little vessel, sinking it in moments.

The undamaged cruiser moves in close to the right walker, and unleashes a powerful broadside. The walker hits the water steaming.

The moment of glory is short-lived, as the remaining two walkers turn their heat rays on the heroic ship and crew.

As the refugee ship, and the three damaged cruiser escape, the Tripods also fall back, to consider the threat that is the Royal Navy. What will tomorrow bring?
SOME GAME NOTES;
The cruisers are my balsa Defense and Warrior class models built last week.
The tripods are built from pre-milled wood pieces bought at Hobby Lobby, then sprayed with chrome paint.
Rules used were Bob Cordery's "Memoir of Battle at Sea". The tripods were considered "pre-dreadnought battleships" with the addition they could each turn launch a "black cloud"by rolling a d6, with a 4,5,6 landing the cloud on a ship. Ships thus hit lose one gunnery dice for the next turn.
Thunder child is a model of the HMS Polyphemes. It was treated as a light cruiser, with no guns,, a bow torpedo and a ram that does four d6 damage.
Ben played the Martians. Spike took the photos. The game took fifteen minutes, and was great fun.
I hope everyone has enjoyed our little tribute to two great talents, Wells(H.G.), and Welles(Orson).
Have a safe and happy Halloween.

The Martians launch their "black clouds", which do no damage to the ships, but do impede the sailors' gunnery. The cruisers hit the tripod on the left for minor damage.

The heat ray hits one of the cruisers, doing frightening damage. Meanwhile, the Torpedo Ram Thunder Child moves up behind the merciless enemy.

The cruisers concentrate their fire against the right most walker, giving the refugee vessel a chance to escape. Thunder Child moves into position, still unnoticed. Three of the cruisers are in trouble.

Thunder Child strikes, hitting with a torpedo, then ramming the left walker. Still it survives.

Two of the walkers turn their heat rays on the valiant little vessel, sinking it in moments.

The undamaged cruiser moves in close to the right walker, and unleashes a powerful broadside. The walker hits the water steaming.

The moment of glory is short-lived, as the remaining two walkers turn their heat rays on the heroic ship and crew.

As the refugee ship, and the three damaged cruiser escape, the Tripods also fall back, to consider the threat that is the Royal Navy. What will tomorrow bring?
SOME GAME NOTES;
The cruisers are my balsa Defense and Warrior class models built last week.
The tripods are built from pre-milled wood pieces bought at Hobby Lobby, then sprayed with chrome paint.
Rules used were Bob Cordery's "Memoir of Battle at Sea". The tripods were considered "pre-dreadnought battleships" with the addition they could each turn launch a "black cloud"by rolling a d6, with a 4,5,6 landing the cloud on a ship. Ships thus hit lose one gunnery dice for the next turn.
Thunder child is a model of the HMS Polyphemes. It was treated as a light cruiser, with no guns,, a bow torpedo and a ram that does four d6 damage.
Ben played the Martians. Spike took the photos. The game took fifteen minutes, and was great fun.
I hope everyone has enjoyed our little tribute to two great talents, Wells(H.G.), and Welles(Orson).
Have a safe and happy Halloween.
Sunday, October 28, 2012
"An Enemy then Flying" The Pursuit of the Goeben
As promised, this week we see the new British armored cruisers in action against the German battle cruiser SMS Goeben., and the light cruiser Breslau. Spike and I played this game in about twenty minutes, using Bob Cordery's Memoir of Battle at Sea, with the addition of a new ship class, the Battle cruiser.
BATTLE CRUISER Move 4 hexes, Gun Range 10, Floatation 12, critical 4 points
The first turn saw the two German ships move on board from the west, trying to get off the east edge without suffering serious damage (critical point or less). Intercepting from the southeast were the British armored cruisers, HMS Warrior, Black Prince, Defense and Duke of Edinburgh. Turn number two saw Goeben range in on the lead British ship.
 The Warrior took three hit points, without being able to respond. Still the cruisers steamed onward in line astern. Both Goeben and Breslau again fired on the squadron leader, inflicting enough damage to make the British ship limp away. Goeben took only minor damage in the exchange. Breslau also was hit by Black Prince.
 In a bold move, the two German ship put on full steam to "cross the T" on the British. Goeben unleashed a salvo on the Black Prince(4 points) while the British ship matched shot-for-shot(5 points). Breslau poured gunfire and torpedoes into the Defense (6 points) , while the British cruiser fired effectively and sank the lighter ship. Warrior continues to slip away from the battle.
 Goeben switched her fire to the battered Defense, and poured in a series of hits that finished what Breslau had started. Defense and Edinburgh inflicted further minor damage to the battle cruiser(now at critical point)
 Goeben tried to steam eastward, on to Constantinople, but Edinburgh moved in, trading iron with the beleaguered vessel (four points of damage each). Goeben heeled over, slipping beneath the waves. Turkey would not receive the German ships.
 The battle was costly. Germany lost its Mediterranean Squadron, and Britain lost one ship, sunk, and two others would be in repair for many weeks. Lord Fisher would praise the squadron for "upholding the traditions of the Navy" by closing with a superior enemy and showing him no mercy. Admiral Troubridge's star was on the rise.
TUESDAY: A MID WEEK SPECIAL EDITION!
NEXT SUNDAY: How to Build a Quick and Easy French Pre-Dreadnought!
BATTLE CRUISER Move 4 hexes, Gun Range 10, Floatation 12, critical 4 points
The first turn saw the two German ships move on board from the west, trying to get off the east edge without suffering serious damage (critical point or less). Intercepting from the southeast were the British armored cruisers, HMS Warrior, Black Prince, Defense and Duke of Edinburgh. Turn number two saw Goeben range in on the lead British ship.


TUESDAY: A MID WEEK SPECIAL EDITION!
NEXT SUNDAY: How to Build a Quick and Easy French Pre-Dreadnought!
Sunday, October 21, 2012
A Visit to my Shipyard
As promised, we are going to pay a visit to my model shipyard. Since August, i have built about two hundred model ships using the basic methods shown on Bob Cordery's "Wargaming Miscellany" site. Since I needed several British Armoured Cruisers for some early war actions, Spike decided to document the process of building a class of ships.
First, do your research. I found the plans for the Minotaur class cruisers in my copy of "Jane's AtWFS 1914". Since I build my models to a 1 /1200 "toy scale", the 520 foot long hull would need to be five inches long. The beam is an over-sized one and a half inches.

Next, I gathered tools and materials. Top row: a sanding block, Elmer's white pva glue, and an antique flatiron. Second row:Exacto saw miter box two pin vises and tweezers. Third row: ruler, razor knife, and pencil.
The materials for these ships would be 3/16" balsa sheet wood(I buy mine in 6"x36" planks), 1/16"x1/8" basswood strips (for gun barrels), 3/16" dowels (for stacks), 3/16"square basswood (for small turrets), 3/16"x1/4" basswood( for large turrets) 1/4"x3/8" balsa (for the bridge) and cocktail skewers (for the masts).

Next, the hulls cut from the 3/16' balsa plank. Two pieces, 1-1/2"x5" are glued and pressed for an hour under the weight of the flatiron. I have pressed up to five hulls under the iron at one time with fine results.

After the glue sets, it is time to draw the hull shape. I wanted a sleek look, so I marked the ends at the 1/4", 1/2", 3/4" 1" and 1-1/4" points. I went down the long sides and marked 1", 1-1/2" and 2". The end 3/4" mark was joined to the side 1" marks. The ends 1/2' and 1' marks were joined to their nearest side 1-1/2' marks, and the 1/4" and 1-1/4" end marks were joined to the side 2" marks. This was done at both bow and stern.

The razor saw was used to cut away scrap from the bow and stern.

The raised quarterdeck was built using the above method, then glued in place and weighted.

The rough hull and quarterdeck is sanded to a smoother shape.

Small parts are mass produced. These include turrets, guns, stacks, bridges and masts. Here a pin vise is used to drill the mounting hole for a mast in the main bridge.

Here is a finished Minotaur next to a hull and all the small parts.

Work goes quickly at this stage. Mounting the small guns is tedious, though and requires tweezers for my hands.
 Here I'm getting a gun barrels ready for the application of Elmer's Glue.

The last part goes on!

The HMS Minotaur and sister ship Defence. Later that evening I finished the Shannon, and the HMS Warrior(1905)

Building these ships produced enough scrap balsa to heat several 15mm scale cities.

Start time to finish for four ships was less than two evenings, even with the modified pace of picture taking. It is fun work, and most ships are launched at a cost of $1.00US or less. This week I will give the finished models a coat of white glue as a sealer, then paint them and apply ensigns printed by Spike.

NEXT SUNDAY: " An Enemy Then Flying" The Goeben vs the Royal Navy; What if...?
First, do your research. I found the plans for the Minotaur class cruisers in my copy of "Jane's AtWFS 1914". Since I build my models to a 1 /1200 "toy scale", the 520 foot long hull would need to be five inches long. The beam is an over-sized one and a half inches.

The materials for these ships would be 3/16" balsa sheet wood(I buy mine in 6"x36" planks), 1/16"x1/8" basswood strips (for gun barrels), 3/16" dowels (for stacks), 3/16"square basswood (for small turrets), 3/16"x1/4" basswood( for large turrets) 1/4"x3/8" balsa (for the bridge) and cocktail skewers (for the masts).

Next, the hulls cut from the 3/16' balsa plank. Two pieces, 1-1/2"x5" are glued and pressed for an hour under the weight of the flatiron. I have pressed up to five hulls under the iron at one time with fine results.

After the glue sets, it is time to draw the hull shape. I wanted a sleek look, so I marked the ends at the 1/4", 1/2", 3/4" 1" and 1-1/4" points. I went down the long sides and marked 1", 1-1/2" and 2". The end 3/4" mark was joined to the side 1" marks. The ends 1/2' and 1' marks were joined to their nearest side 1-1/2' marks, and the 1/4" and 1-1/4" end marks were joined to the side 2" marks. This was done at both bow and stern.

The razor saw was used to cut away scrap from the bow and stern.

The raised quarterdeck was built using the above method, then glued in place and weighted.
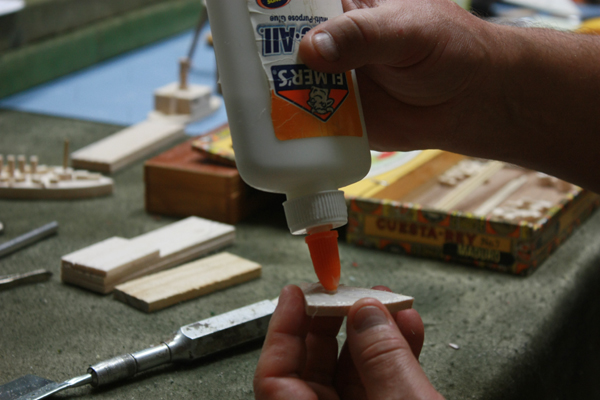
The rough hull and quarterdeck is sanded to a smoother shape.

Small parts are mass produced. These include turrets, guns, stacks, bridges and masts. Here a pin vise is used to drill the mounting hole for a mast in the main bridge.

Here is a finished Minotaur next to a hull and all the small parts.

Work goes quickly at this stage. Mounting the small guns is tedious, though and requires tweezers for my hands.


The last part goes on!

The HMS Minotaur and sister ship Defence. Later that evening I finished the Shannon, and the HMS Warrior(1905)

Building these ships produced enough scrap balsa to heat several 15mm scale cities.
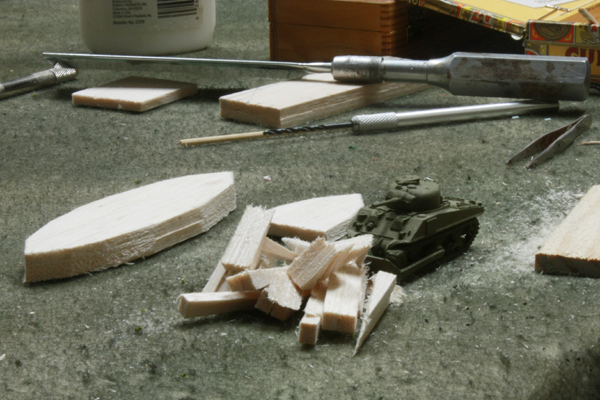
Start time to finish for four ships was less than two evenings, even with the modified pace of picture taking. It is fun work, and most ships are launched at a cost of $1.00US or less. This week I will give the finished models a coat of white glue as a sealer, then paint them and apply ensigns printed by Spike.

"On the Mediterranean patrol"
NEXT SUNDAY: " An Enemy Then Flying" The Goeben vs the Royal Navy; What if...?
Tuesday, October 16, 2012
Memoir of Battle at Sea 1860s-70s: Two Actions
One of the happiest finds of this year was my discovery of Bob Cordery's "Memoir of Battle at Sea 1860s-70s" on his "Wargaming Miscellany" blog. with only two pages of rules and charts, a few model ships a handful of six sided dice and a hex gridded board or cloth, you can re-fight the sea battles of the American Civil War, the Great Pacific War of Chile and Peru, the German and Italian Wars of Unification, and a host of "what if" conflicts involving Britain, Russia and France as they play "the Great Game".
On Sunday night, Spike and I played two actions involving the Peruvian Monitor Huascar. In the first, Huascar was trying to get back to port, and was intercepted by HMS Shah and Amethyst. In the second the Peruvian ironclad, assisted by the gunboat Union, was ambushed by the Chilean casemate ironclads Almirante Cochrane and Blanco Encalada
The first game, played on a grid of 8x11 hexes. Saw the Huascar plodding toward her safe haven(move of one hex per turn), while the English ships, Shah, a frigate(two hexes/turn) and Amethyst, a gunboat(three hexes/turn) used their speed to close the range. On turn two, during the initial firing phase, the Huascar's guns could reach Amethyst, while the two English ships were unable to return fire. Huascar has a gun factor of six. She can roll six dice to fire, minus one die for each hex of range beyond one. At a range of four, Huascar rolls three dice, getting a 6(2 hits),5(1 hit), and 2(miss), for a total of three hits. Amethyst is down to one floatation factor, and must try to leave the fight.
 |
| The English on the move |
Shah moves in, trying to get an effective broadside on the Peruvian monster, without success. The Huascar fires another very powerful salvo, doing three points of damage to the floatation of Shah .The English frigate pulls alongside and fires a broadside, dealing three hits, while receiving another two.


Shah, in desperation, stands by her guns and trades salvoes, doing four point of damage. Huascar sinks the gallant frigate with three more hits, then limps home to port.

The second battle saw five ships in action. The Huascar and Union, trying to get home, were ambushed by the Chilean ironclad Blanco Encalada and the gunboat Corvadonga. The Union and Blanco traded broadsides early, sinking the Peruvian gunboat. Union did land five hits on the casemate ironclad, setting her up for Huascar, which sank the Corvadonga with one devestating salvo at close range.

 |
| "action opens" |

Both Chilean vessels fired on the Huascar, without damaging the monster. Huascar, meanwhile, sank the Blanco. The monitor continued to move toward her objective. Cochrane moved to cut off the escape. Huascar fired two salvos into Cochrane doing seven points of damage. Cochrane could only manage one point or the Peruvian.

Huascar made her first mistake of the battle, moving into the past of the oncoming Cochrane. The Chilean rammed her, doing six points of damage. Both ships traded fire, sinking each other. A battle of heavyweights was over.

Both games were played in less than an hour, even with extra time spent taking pictures. This is a fast, fun set of rules that allows you to "fight your ship" rather than "fight a rulebook" . Gunnery becomes intuitive in about three turns, and the variable initiative system can reward or doom a gambler.
 |
| "Engage the enemy more closely" |
NEXT SUNDAY: A Visit to my Model Shipyard

Subscribe to:
Posts (Atom)